A garden hose is a vital tool for any gardener, but sometimes you might find yourself with a hose that’s too long for you.
Fortunately, it’s easy to shorten a garden hose, and with the right tools and techniques, you can customize it to the perfect length.
In this article, we’ll guide you through the process of shortening a garden hose, repairing a broken hose, and maintaining it for optimal performance.
Contents
Types of Garden Hoses
Before we dive into the process of shortening a garden hose, let’s briefly discuss the different types of garden hoses available on the market.
Polyurethane Hose
Polyurethane garden hoses are highly durable, lightweight, and resistant to kinks, making them a popular choice among gardeners.
They can be more expensive than other options, but they offer a longer lifespan and better performance. These can take a bit more effort to cut and shorten compared to other types but it is doable.
Vinyl Hose
Cheaper vinyl hoses are the most affordable option. They are often reinforced with nylon or corded mesh to add to their strength.
But they can be prone to kinks and wear out more quickly than polyurethane types of hoses. Vinyl hoses are quite easy to shorten.
Rubber Hoses
This hose can handle some serious roughhousing while still being flexible and easy to bend into a coil. Even if it gets a little kinked up, those wrinkles can usually be smoothed out without leaving any lasting damage.
I have a particular black rubber hose that’s my absolute fave. It’s been through a lot with me.
While it can leave some marks on concrete, hands, or clothes if it rubs too hard, those scuffs wash off easily. All in all, it’s a tough and dependable tool that I wouldn’t want to be without and it’s also easy to shorten if needed.
Polymer Hoses
This material is a real champ when it comes to being safe for drinking water. Not only that, but it’s also super lightweight, soft, and flexible, making it a breeze to wrap around all sorts of things like plants, pots, and even tight corners.
Being made of a lighter material means that they can be shortened.
Plus, when it’s time to put it away, it coils up like a dream.
Expandable Hose
Expandable hoses are lightweight and easy to store, as they expand when filled with water and contract when empty.
However, they may not be as durable as other hose types. They can also be difficult to shorten.
Metal Hose
I absolutely adore a metal hose! Sure, they are a bit more expensive, but it’s incredibly durable and surprisingly lightweight. Plus, it doesn’t kink – although, I’ll admit, I’ve managed to twist it up on occasion.
What I love most is how effortlessly I can drag it around, and it uncoils like a dream.
However, when it comes to shortening a metal hose, you better be prepared with the correct tools.
Tools Required for Shortening a Garden Hose
Before you begin, gather the following tools and materials:
- A measuring tape
- A hose cutter or sharp utility knife
- Hose clamps
- A new hose fitting – Try to avoid aluminum fittings. They are cheaper but can corrode and get stuck to a brass spigot.
- A marker pen or electrical tape
- Needle-nose pliers – To remove the old fitting and tighten your new hose clamp.
How to Shorten a Garden Hose: Step-by-Step Guide
Measuring the Desired Length
if you want to make sure your garden hose is up to the task, you gotta unroll that sucker all the way. Trust me, there’s nothing worse than getting halfway through watering your yard only to realize that your hose doesn’t quite reach the spots that need it most.
- Unroll the hose and make sure that it will reach where you need it at the shorter length.
- Measure the desired length of your hose, considering the distance from your water source to the furthest point in your garden that needs watering.
- Mark the spot on the hose where you want to cut it, using colored tape or a marker.
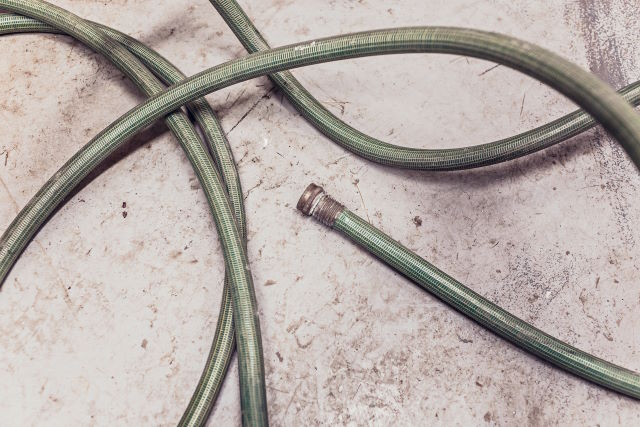
Cutting the Hose
- Using a hose cutter or a sharp utility knife, carefully cut through the hose at the marked spot. Be sure to cut straight across the hose to ensure a clean, even cut. A wavy or uneven line can make fitting the new piece a challenge, increasing the risk of leaks.
- If your hose has an outer cover, use a utility knife to remove it before cutting through the inner layer.
Removing Old Fittings
- If you plan to reuse your old or ill-fitting fittings, use needle-nose pliers to remove them carefully.
Attaching New Fittings
- To attach new fittings, firstly dip the cut end of the hose in hot water for a few seconds to soften it. Alternatively, you can use a heat gun or hairdryer. This will make it easier to insert the new fitting.
- Put your new clamp onto the hose before installing the new fitting.
- Push the new brass or aluminum fitting into the hose until firmly seated. If your hose has ridges, make sure the fitting lines up with them.
- Secure the fitting with the hose clamp, tightening it until snug but not overly tight, as this could cause the hose to leak.
Change Your Gaskets
Now you have shortened your hose. It’s a good idea to take care of some other maintenance tasks such as changing the gaskets and washers in your attachments to keep them leak-free.
Final Thoughts
Shortening a garden hose or repairing a broken one is a simple process that can save you money and ensure your hose is the perfect length for your needs.
Frequently Asked Questions
Can I use a regular pair of scissors to cut my garden hose?
It’s best to use a hose cutter or a sharp utility knife for a clean, even cut. Scissors might not be strong enough to cut through the hose material.
What’s the difference between a brass fitting and an aluminum fitting?
Brass fittings are more durable and resistant to corrosion, making them a better choice for long-term use. Aluminum fittings are lighter and less expensive, but they may corrode over time and become fused to a brass spigot.